You are using an out of date browser. It may not display this or other websites correctly.
You should upgrade or use an alternative browser.
You should upgrade or use an alternative browser.
Head jobs...
- Thread starter MWP
- Start date
350ep70gr
Member +
Here you are mate.
I cant confirm what gains because at same time many thinks was changed in the engine as forged internals,injectors,turbo,ecu etc.
And also this fotos was taken during the job so this is not final resault. More or less i use this as a guide but had previus experience with many bike cyl heads.
It is easy to do a basic diy port and polish job to a 4e-fte head. All you need is a dremel with stones, sandpaper, practise, and little step at the time and a lot of time!! I made two heads at the past and seems to work perfect (I had experience with 4 cyl bike heads before)
A simple guide for 4e-fte head is (what I do)
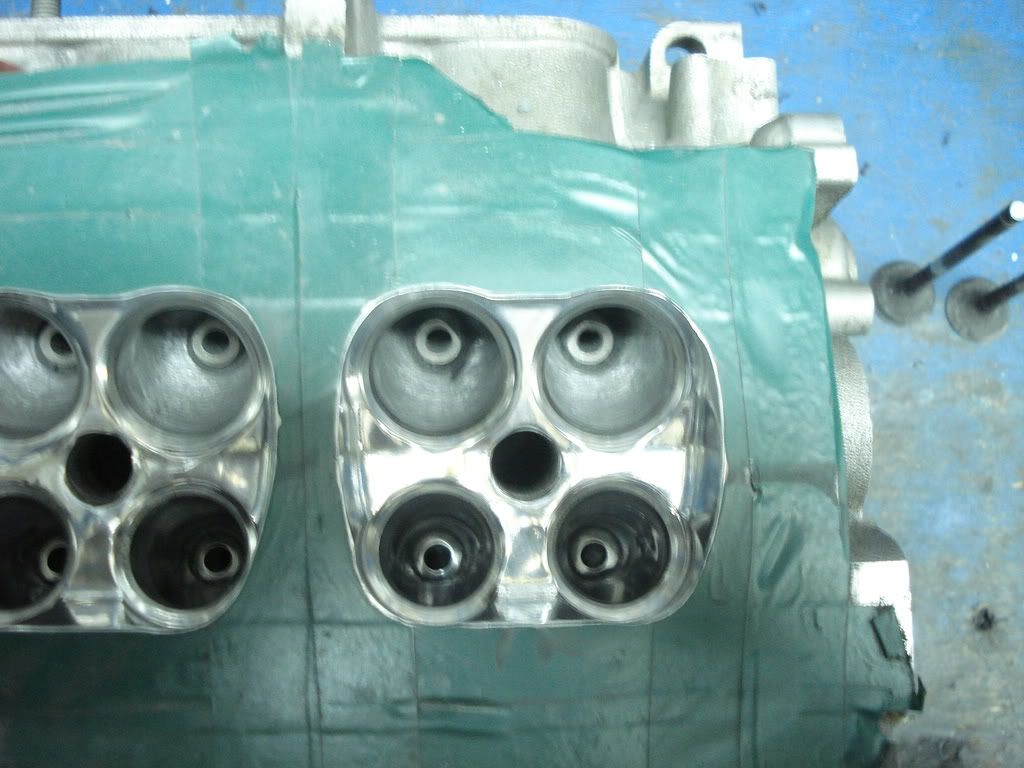
1. Intake ports.
At first you take an intake gasket and with a pencil you paint the inner line on the face of the ports. This is the maximum point that you can put out the metal from the out side of the port. (Match the gasket and the head). Inside the port you smooth everything (usually flash from moulding) till the valve guide. I suggest to not going further than the valve guide if this is your first time. You will also notice that further inside the port has a wall that diverse the port in two ports. The face of wall must be knife edged so use 45 degree when porting from both directions. After you smooth everything with sand paper but not a mirror finish. Mirror finish can be only 1-2 cm (till the injector).Mirror finish after injector is bad for mixing the fuel. You can feel by finger time to time when grinding and you will see where needs grinding. Some cut the little part of the valve guide that inserts the port but I don’t recommend because life time of the valve-seat-guide are decreased. If you plan to go to higher rpm don’t think about at all. Also something very important is valve throat. As you see from the chamber through the valve seat the smallest diameter is the throat and this must be smooth where valve seat meets the head. Be very careful there because no scratch at the seat is allowed. Also this diameter must be 85-90% of the valve diameter but can’t do this by hand. You need a special grinding tool.
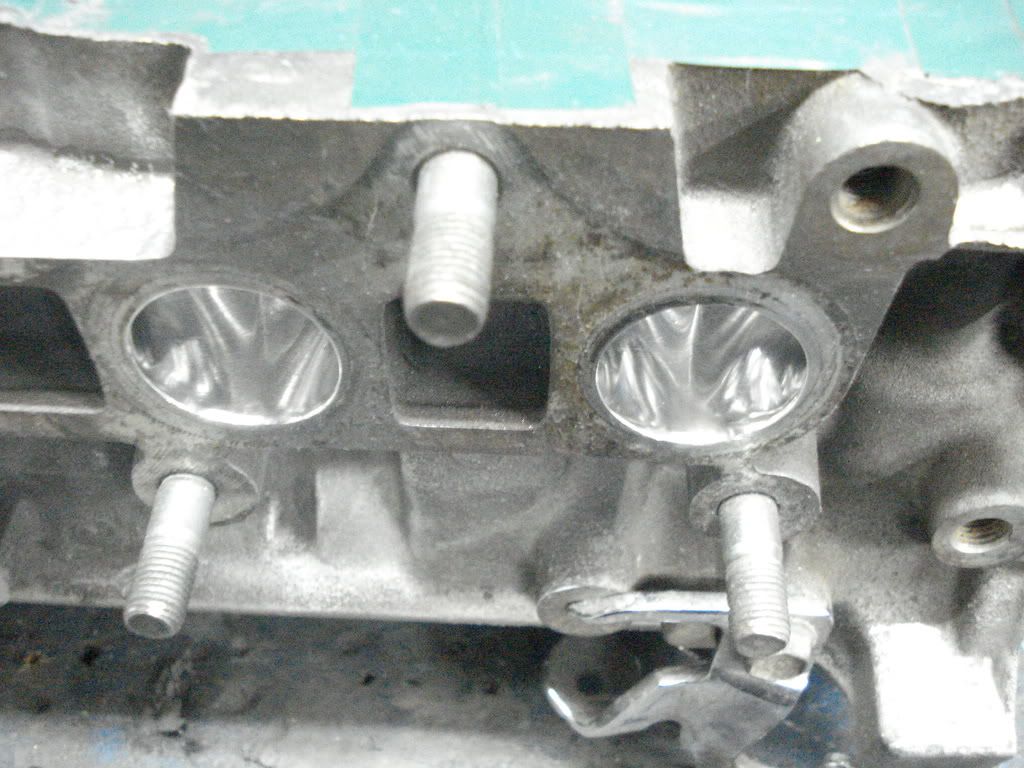
2. Exhaust port.
Same as intake. You put the gasket, paint, grinding (match the gasket with the head) (some say that should match the gasket perfect with the head, some other say to leave a small step. I left a small step of 1mm around the gasket.) The divorce wall must be knife edged and the difference here is that the exhaust ports can be mirror finish. (I use water with a water sand paper from step 320-600-800-1000grid.The valve throat must be 85-90% of the valve diameter.
3. Compresion chamber
You smooth everything with sand paper and wd-40 or water or petroleum or grinding oil (additives give a very good mirror finish.)
Very important here is to match the volume of the chamber with each other. I think that 4e-fte head is 39cc(not sure).If you measure lets say all the chamber and the bigger is 39,5cc you must grid the rest 3 of them to 39,5cc or add metal by welding to the bigger to match the smaller. All must be equal.
An other tip is when you go with bigger valves (I have 1mm bigger custom valves) you need to unsround the valve to the chamber wall at least 2mm around. If you go with standard valves don’t bother you don’t need this.
4 Valve job.
3 or 5 angle job helps more than all i write till know. (I suggest 5 angles)Need professional tool to do this job or go to a shop and ask for five angle job. Reseat the new valves (necessary). Check two times that is no leak between valve and seat. (Important).
5. General tips.
Cover all surface that gasket are touching because we don’t want a scratch by accident there.
Do little steps at the time when grinding and try to feel the surface by finger time to time.
USE PROTECTIVE GLASSES (believe me it hurts when a small piece of aluminium go to your eye.)
Don’t hurry.
Resurface the head after all
Use harder valve springs
Intake cam with more duration and lift (or both cams)
New gasket all around
Match intake manifold to the new port. (Intake runners can be mirror finish)
Insulator between intake manifold and head (custom)
And that’s all.
Before start the job try this link. Is very good guide.
http://www.sa-motorsports.com/diyport.aspx
Good luck.
I cant confirm what gains because at same time many thinks was changed in the engine as forged internals,injectors,turbo,ecu etc.
And also this fotos was taken during the job so this is not final resault. More or less i use this as a guide but had previus experience with many bike cyl heads.
It is easy to do a basic diy port and polish job to a 4e-fte head. All you need is a dremel with stones, sandpaper, practise, and little step at the time and a lot of time!! I made two heads at the past and seems to work perfect (I had experience with 4 cyl bike heads before)
A simple guide for 4e-fte head is (what I do)
1. Intake ports.
At first you take an intake gasket and with a pencil you paint the inner line on the face of the ports. This is the maximum point that you can put out the metal from the out side of the port. (Match the gasket and the head). Inside the port you smooth everything (usually flash from moulding) till the valve guide. I suggest to not going further than the valve guide if this is your first time. You will also notice that further inside the port has a wall that diverse the port in two ports. The face of wall must be knife edged so use 45 degree when porting from both directions. After you smooth everything with sand paper but not a mirror finish. Mirror finish can be only 1-2 cm (till the injector).Mirror finish after injector is bad for mixing the fuel. You can feel by finger time to time when grinding and you will see where needs grinding. Some cut the little part of the valve guide that inserts the port but I don’t recommend because life time of the valve-seat-guide are decreased. If you plan to go to higher rpm don’t think about at all. Also something very important is valve throat. As you see from the chamber through the valve seat the smallest diameter is the throat and this must be smooth where valve seat meets the head. Be very careful there because no scratch at the seat is allowed. Also this diameter must be 85-90% of the valve diameter but can’t do this by hand. You need a special grinding tool.
2. Exhaust port.
Same as intake. You put the gasket, paint, grinding (match the gasket with the head) (some say that should match the gasket perfect with the head, some other say to leave a small step. I left a small step of 1mm around the gasket.) The divorce wall must be knife edged and the difference here is that the exhaust ports can be mirror finish. (I use water with a water sand paper from step 320-600-800-1000grid.The valve throat must be 85-90% of the valve diameter.
3. Compresion chamber
You smooth everything with sand paper and wd-40 or water or petroleum or grinding oil (additives give a very good mirror finish.)
Very important here is to match the volume of the chamber with each other. I think that 4e-fte head is 39cc(not sure).If you measure lets say all the chamber and the bigger is 39,5cc you must grid the rest 3 of them to 39,5cc or add metal by welding to the bigger to match the smaller. All must be equal.
An other tip is when you go with bigger valves (I have 1mm bigger custom valves) you need to unsround the valve to the chamber wall at least 2mm around. If you go with standard valves don’t bother you don’t need this.
4 Valve job.
3 or 5 angle job helps more than all i write till know. (I suggest 5 angles)Need professional tool to do this job or go to a shop and ask for five angle job. Reseat the new valves (necessary). Check two times that is no leak between valve and seat. (Important).
5. General tips.
Cover all surface that gasket are touching because we don’t want a scratch by accident there.
Do little steps at the time when grinding and try to feel the surface by finger time to time.
USE PROTECTIVE GLASSES (believe me it hurts when a small piece of aluminium go to your eye.)
Don’t hurry.
Resurface the head after all
Use harder valve springs
Intake cam with more duration and lift (or both cams)
New gasket all around
Match intake manifold to the new port. (Intake runners can be mirror finish)
Insulator between intake manifold and head (custom)
And that’s all.
Before start the job try this link. Is very good guide.
http://www.sa-motorsports.com/diyport.aspx
Good luck.
Last edited:
350ep70gr
Member +
Thanks for that!
I know the basics of port & polishing (have done it on my 1UZ engine previously), but its good to read it all again.
I guess im mainly interested in the combustion chamber and if it could do with any reshaping (having the sharp edges taken off, etc)?
For reshaping further the chamber you really wan to have a flow bench especially if you try to reform the squish bands. Also you need sharp edges around the chamber where head meets the hg for better sealing. If you wan to go one step further you can unsround the valves (not need in std valves btw in my eyes). mainly reshaping is need it when you wan to change cr by this way. Personaly i dont recomend this way.As far your chambers are equal volume in between and the surface is close to a mirror finish you have the 80% of the best you can do in a diy job.Touching the squish bands may more likely you destroyed the performing of the head. (Just my opinion on this and keep in mind that the 4e head is very well designed for most of the aplications).
350ep70gr
Member +
Well this is what i did.
Took me ~6hrs to clean up the head, do the port matching & some polishing (both intake manifold & head).
Before:

After (i did polish it more than this, but no photos ):
):

Exst ports cleaned & polished:

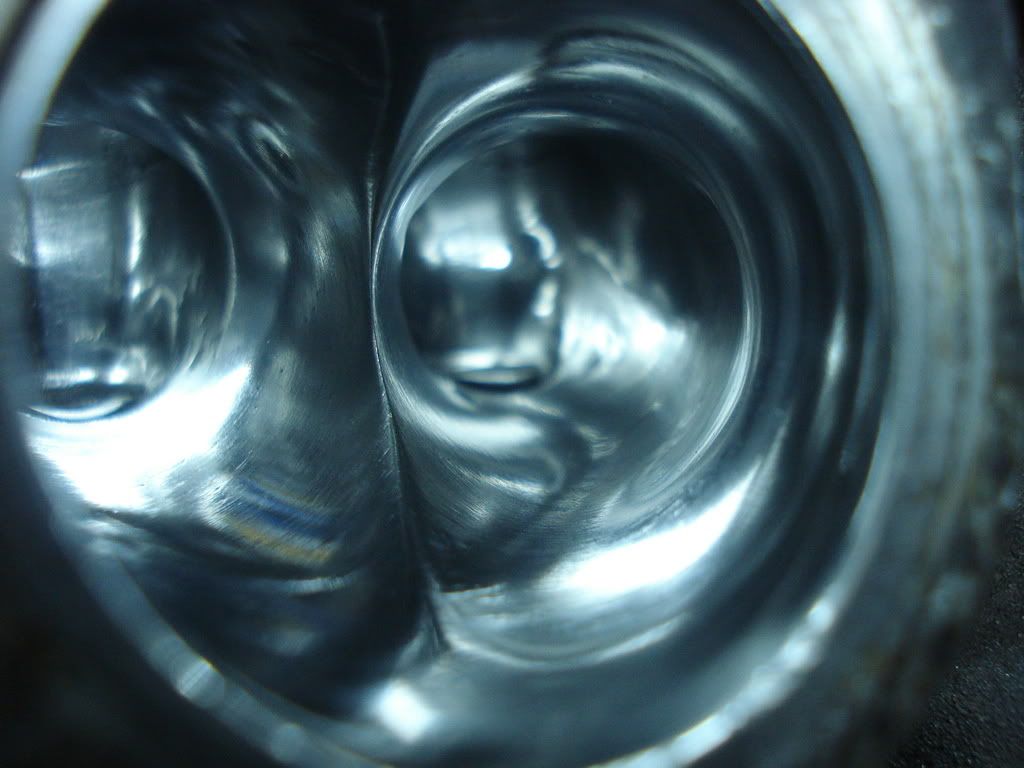
Before and After piston tops:

Being reassembled:

I did port & polish both the intake ports and intake manifold, but forgot to take photos
Took me ~6hrs to clean up the head, do the port matching & some polishing (both intake manifold & head).
Before:
After (i did polish it more than this, but no photos
):
Exst ports cleaned & polished:
Before and After piston tops:
Being reassembled:
I did port & polish both the intake ports and intake manifold, but forgot to take photos
Sheldon
Malta Area Rep.
You are correct... partly.
You can polish to a mirror finish BEFORE the injectors in the intake ports.
After the injectors needs to have a dullish finish to help stop fuel from sticking to the walls.
yes
thanks foor clearing that up