gv1.3
Admin
Original Article Credit: dmw_86
Procedure for removal and cleaning of idle control valve
Tools needed:
10mm spanner or socket & wrench
Flat blade screw driver
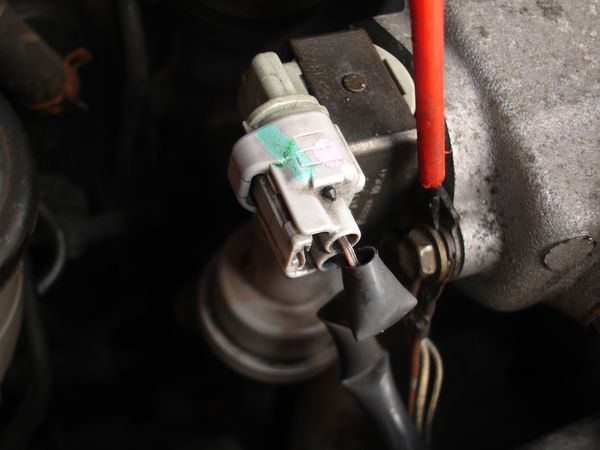
Located on the left side of the inlet manifold, next to the brake master cylinder. First remove the grey connector.
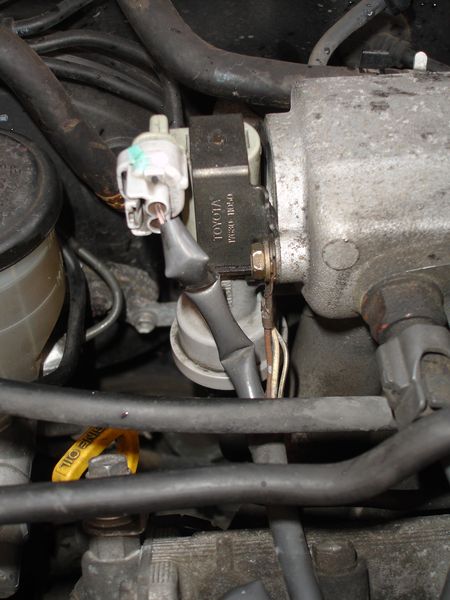

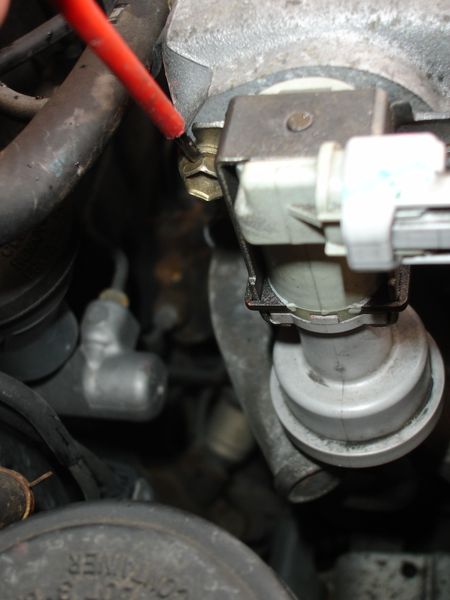
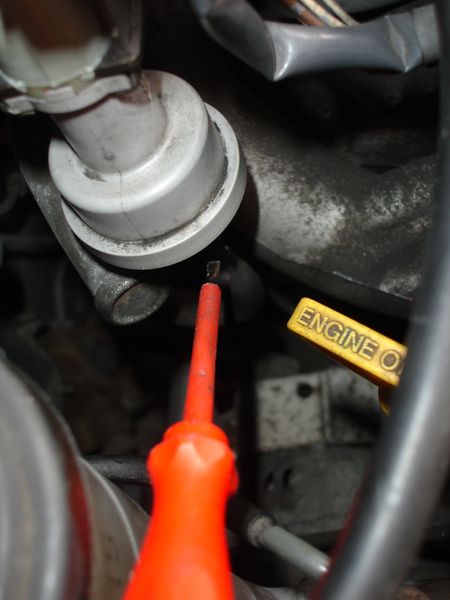
The ICV is attached to the inlet manifold by two 10mm bolts. The front is easily accessible (and also holds earthing wires), the back is a little more awkward as it is slightly obstructed by the strut brace, but still easy enough with a 10mm socket.
Once the bolts are out, remove the hose attached to the base. You may need to fiddle with the hose clip to loosen its grip.
The valve can then be removed from the inlet manifold to the left. An o-ring provides a good seal to the inlet mani so it might need a little wiggle first.
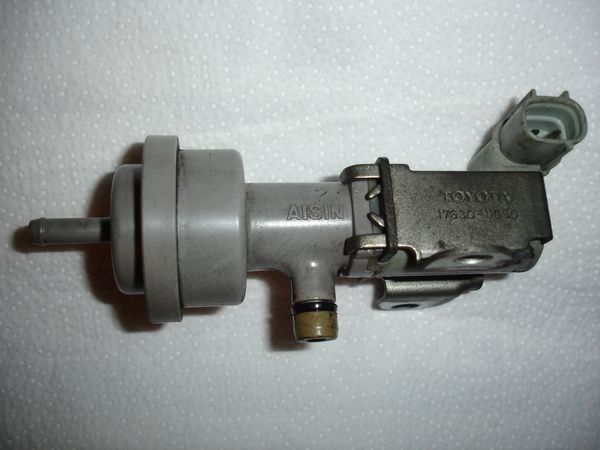
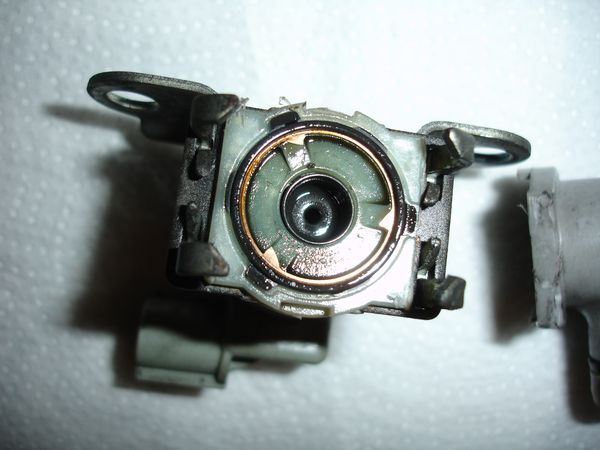
One Idle Control Valve:
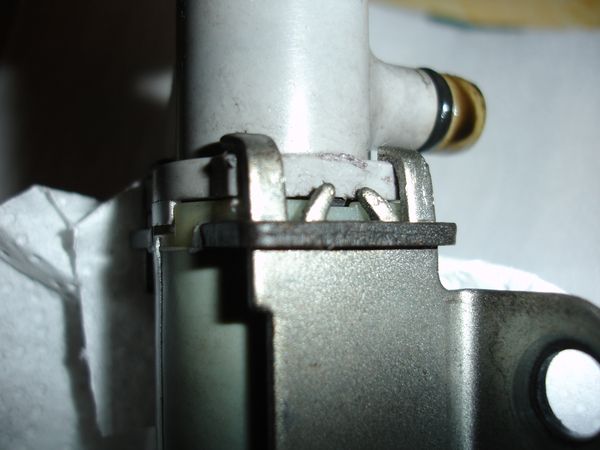
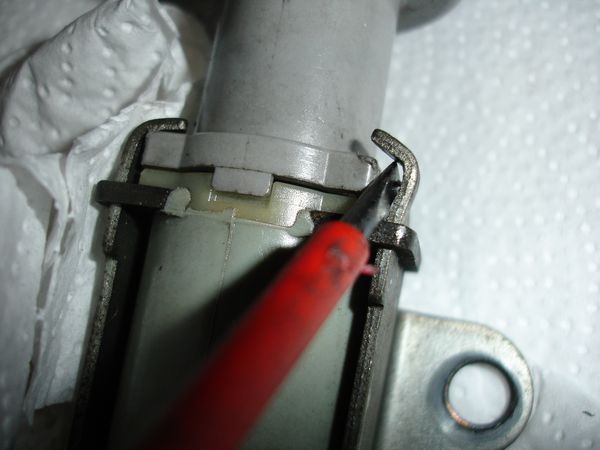
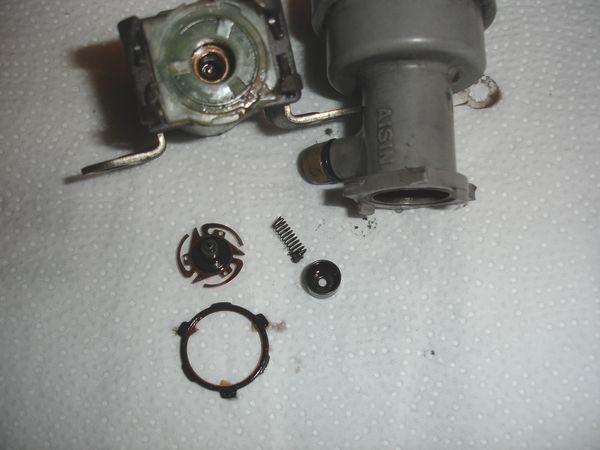
Four metal tabs hold the two halves together. I used a flat blade screwdriver to prise the tabs away.
Open carefully, and you will find the following:
I've read that the copper vane thingy (yeah, I know not particularly technical ) can break so if it comes out in bits then you'll be making a trip to Toyota!
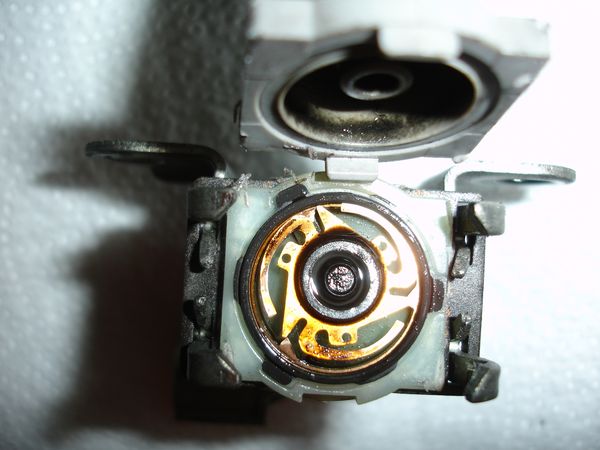
A metal cup retains a spring, and holds the axle of the copper vane.
I used carb cleaner and cotton buds to gently clean the nozzles and other parts. Expect a fair amount of carb deposits! Once all clean and shiny (and free of any debris) re-assemble. I found a pair of pliers or chicken legs were best for reshaping the tabs back over the two halves.
Fingers crossed a simple clean sorts things for you. However, if not, then besides checking other possible causes of a bad idle it might well be a trip to Toyota for a new ICV.
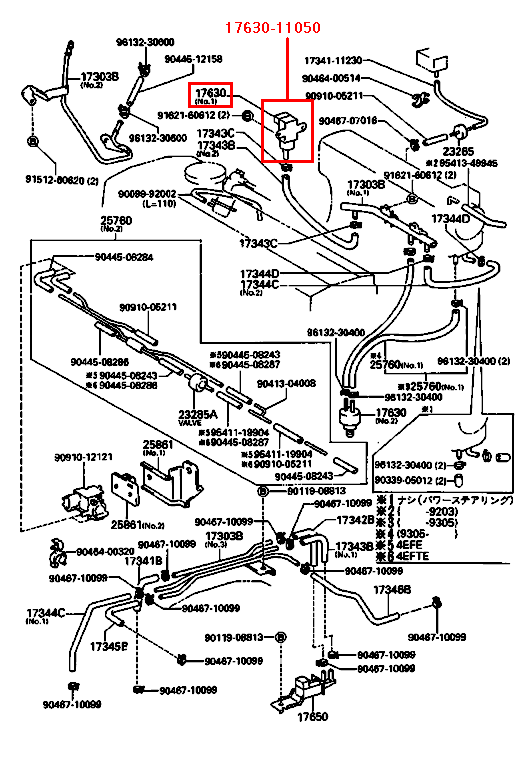
Attached is the EPC diagram for reference.
The Toyota Part Number is: 17630-11050 "Valve Assy, Air"
Price is just under £96 at time of writing.
Procedure for removal and cleaning of idle control valve
Tools needed:
10mm spanner or socket & wrench
Flat blade screw driver
Located on the left side of the inlet manifold, next to the brake master cylinder. First remove the grey connector.
The ICV is attached to the inlet manifold by two 10mm bolts. The front is easily accessible (and also holds earthing wires), the back is a little more awkward as it is slightly obstructed by the strut brace, but still easy enough with a 10mm socket.
Once the bolts are out, remove the hose attached to the base. You may need to fiddle with the hose clip to loosen its grip.
The valve can then be removed from the inlet manifold to the left. An o-ring provides a good seal to the inlet mani so it might need a little wiggle first.
One Idle Control Valve:
Four metal tabs hold the two halves together. I used a flat blade screwdriver to prise the tabs away.
Open carefully, and you will find the following:
I've read that the copper vane thingy (yeah, I know not particularly technical
) can break so if it comes out in bits then you'll be making a trip to Toyota!
A metal cup retains a spring, and holds the axle of the copper vane.
I used carb cleaner and cotton buds to gently clean the nozzles and other parts. Expect a fair amount of carb deposits! Once all clean and shiny (and free of any debris) re-assemble. I found a pair of pliers or chicken legs were best for reshaping the tabs back over the two halves.
Fingers crossed a simple clean sorts things for you. However, if not, then besides checking other possible causes of a bad idle it might well be a trip to Toyota for a new ICV.
Attached is the EPC diagram for reference.
The Toyota Part Number is: 17630-11050 "Valve Assy, Air"
Price is just under £96 at time of writing.