madman
Member +
You will need:
Flathead screwdriver(s)
10mm socket
Torque wrench
Needle nose pliers
Spray paint of your choice, I chose matte black VHT spray
Drill and abrasive brush (from Halfrauds )
White spirit, de-greaser & cloths
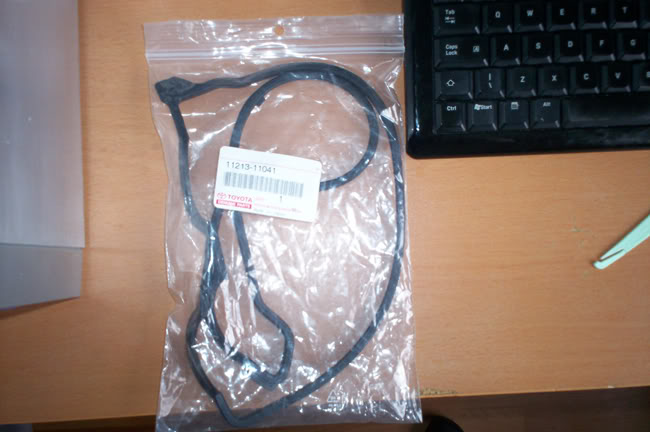
New Toyota rocker cover gasket – Part No 11213-11041
New Toyota washers and nuts (not necessary, but might as well!)
About:
Removing and spraying your rocker cover is very straight forward and requires very little technical know-how or tools! Easily attemptable for almost anybody! Doesn’t take very long either! 15mins to take cover off, then prep and paint leave to try and re-fit!
Guide:

- Remove HT leads (remember their order for re-fitting!) and keep to one side.
- Disconnect hose from PCV valve to inlet mani (circled red) and any other bits that might be in the way.
- Unbolt EFI pipe from bracket and rotate EFI pipe slightly forward to give you some more room.
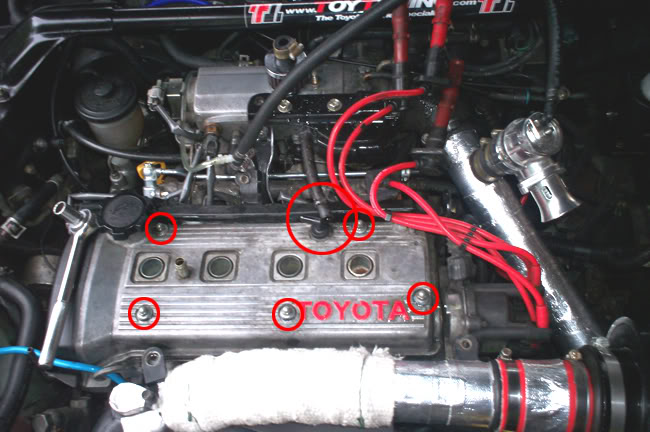
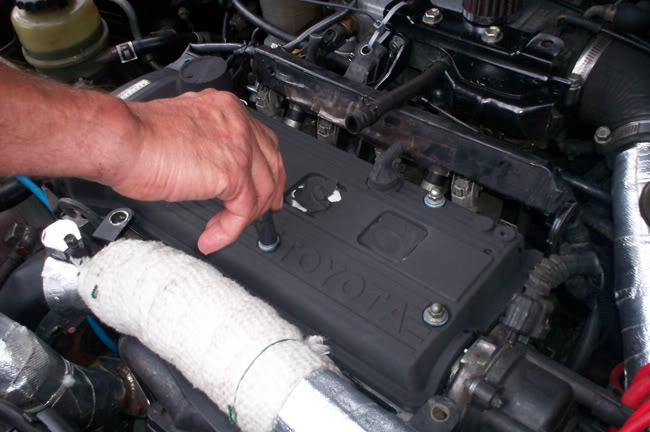
- Locate the five nuts that hold the rocker cover in place (circled red).
- Remove nuts with 10mm socket
- Once the nuts have been removed you will see the five rubber washers that sit beneath them.
- I did not buy new nuts/washers so use a combination of pliers and flat head screwdriver and gently remove the washers without damaging them.
- Once the washers are away the rocker cover needs to come out, however the injector loom behind the rocker cover gets in the way and stop its from lifting up.
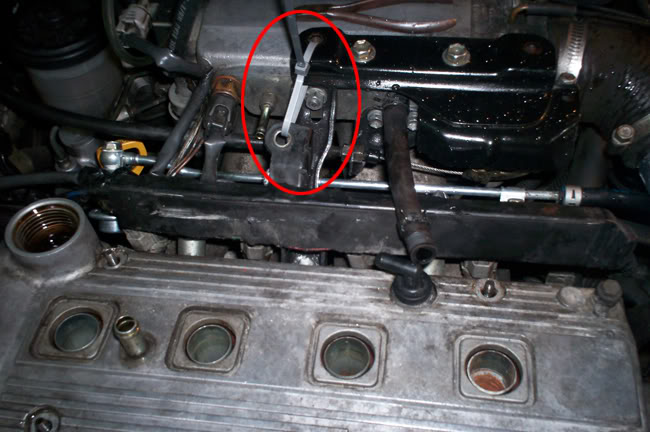
- Undo the 10mm bolt that holds the plastic box to the support bracket and cable tie it to the throttle cable protector (circled red). Keeps it well out of the way for removing the cover.
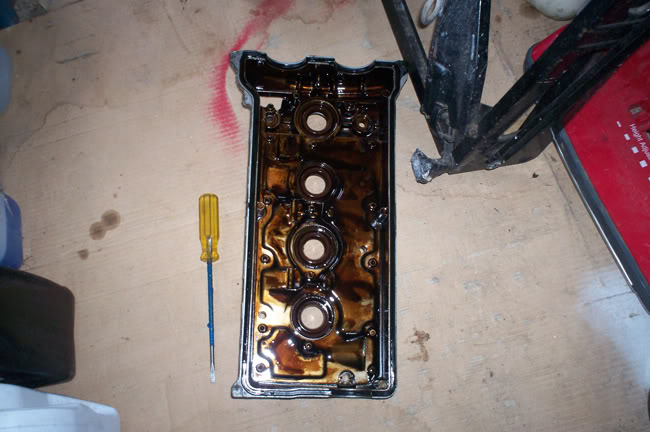
- Now this is out of the way make sure everything else is clear, and use a flat head screw driver for each of the four corners of the cover and gently prise the cover up. Once all four corners are free wiggle the cover off, be very gentle if you’re not going to be replacing the gasket as I was a bit brutish and tore the gasket.
- TIP: The bracket the EFI pipe bolts to gets in the way so it’s best to try and get the cover out from the back. It should come out fairly easily.
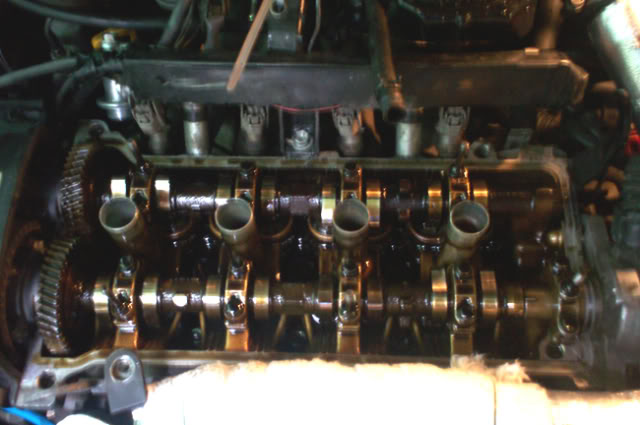
- Once the covers off you should see the following:
- TIP: You can’t see it that well, but there were bits of gasket that stuck to the head. Use needle nose pliers and gently remove these as they may prevent the new gasket from seating properly.
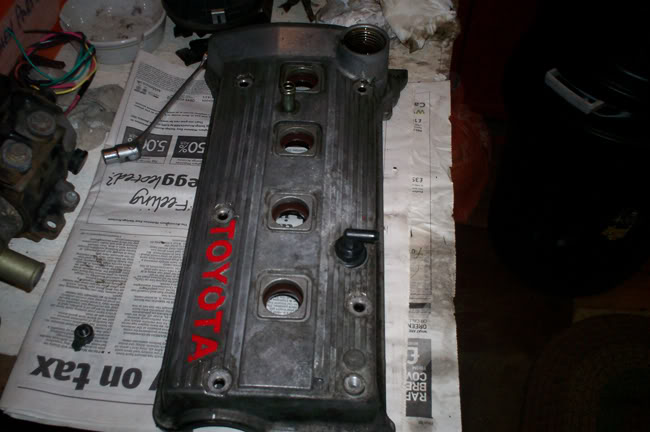
- Prep time! First of all I used some de-greaser and cloth to get most of the muck off, then a wire brush and some wire wool. Once I was relatively happy I started to use a drill and abrasive brush drill bit, cleaned it up a treat!
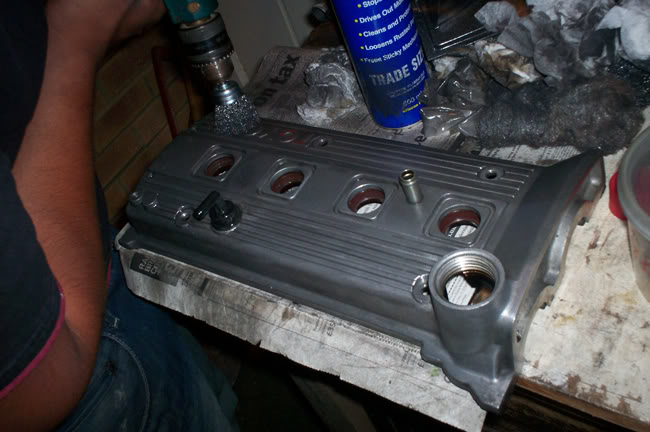
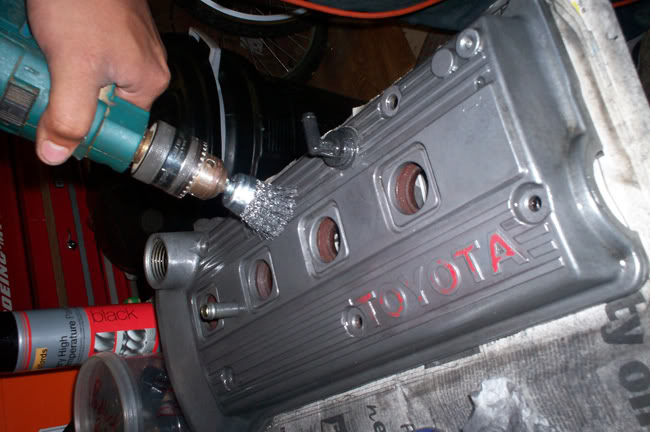
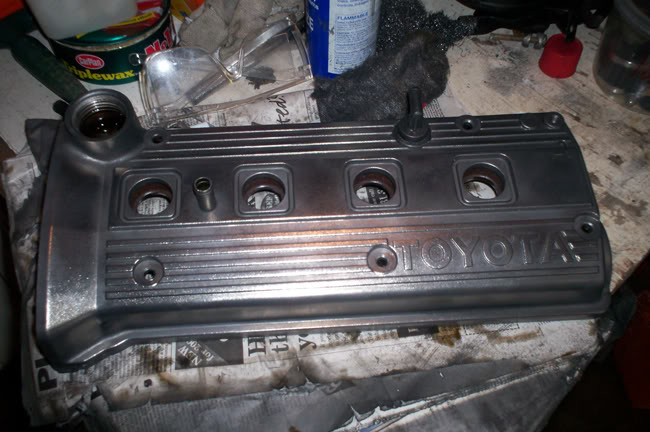
- Took about 30mins of cleaning to get it shiny.
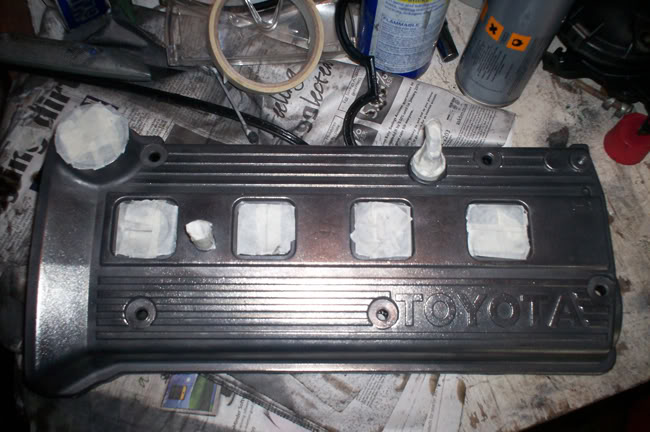
- It was now ready for paint so I used some white spirit and a cloth to clean the surface up as best I could and masked up the areas I didn’t want to be sprayed (PCV valve, oil breather, oil filler and spark plug holes).
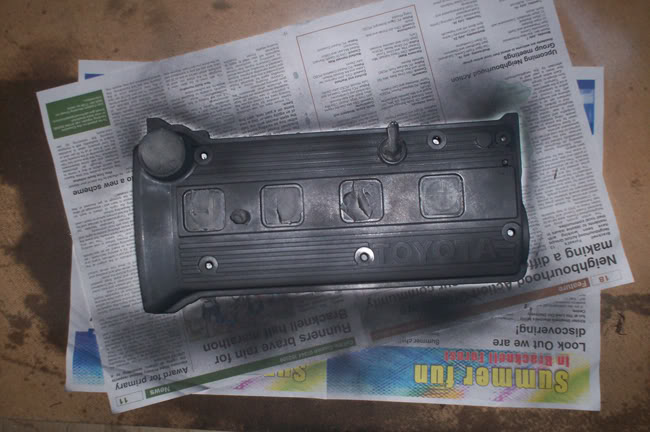
- You can now begin painting! I built it up with a number of thin light coats. Leave to dry. I only left it about 1.5hrs as the VHT stuff dries incredibly quick and will properly cure once on the engine and it gets hot.
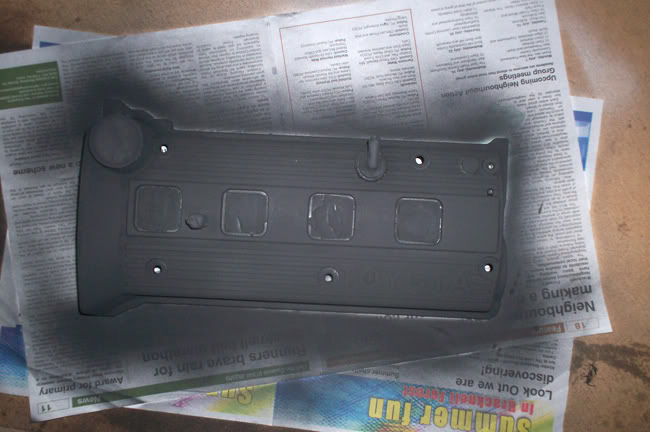
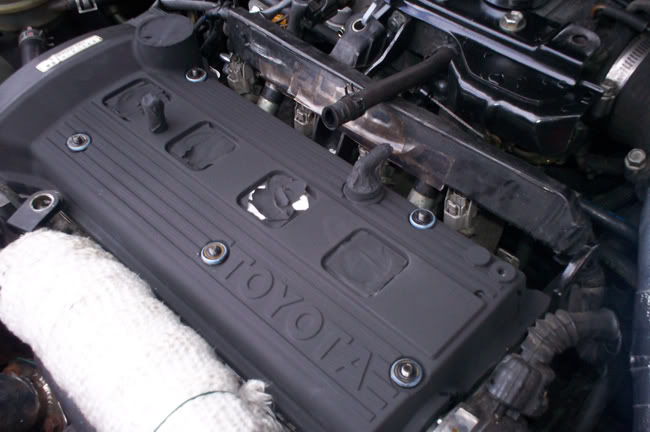
- Rocker cover painted! Now to refit it!
- It’s simply a matter of doing the above steps in reverse, making sure to properly fit your new gasket of course! Simply pull the old one out of the rocker cover and push in the new one.
- Now gently put the rocker cover back onto the head so it lines up and the lugs show through. A bit of wiggling is required
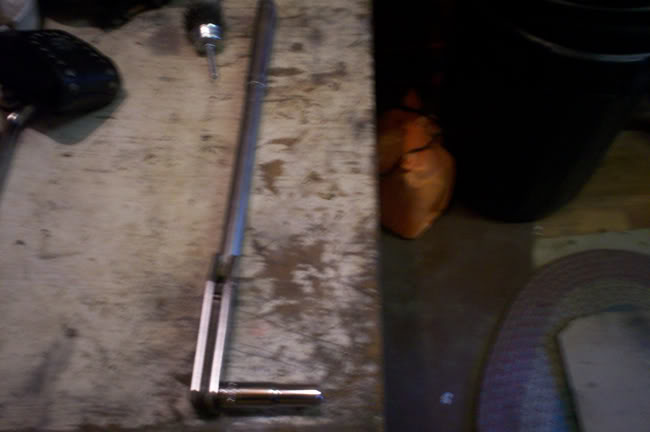

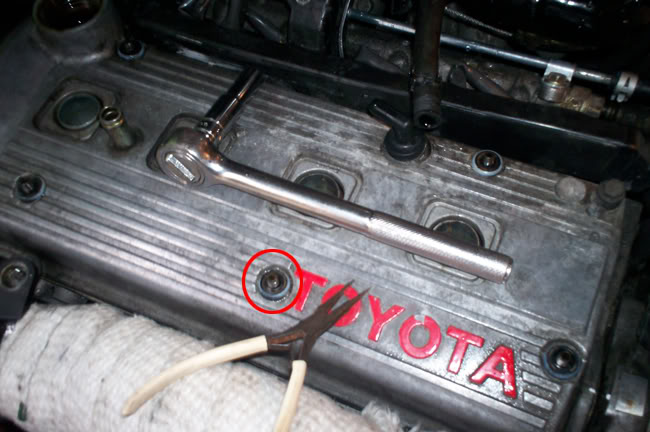
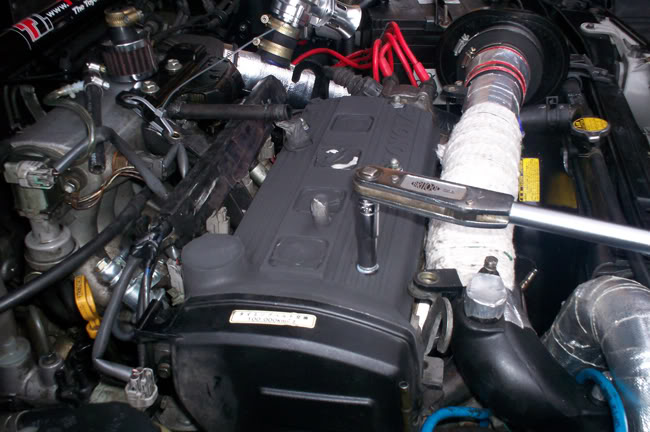
- It may not be necessary to properly torque the nuts but I did, better to be safe than sorry! You want to torque them to 7Nm using a torque wrench like the above one.
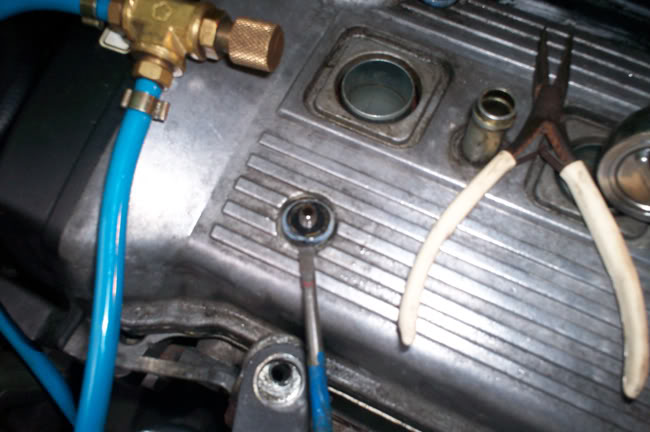
- Re-fit the rubber washers (give them a clean)
- Lightly hand tighten the nuts in criss-cross order; so starting with top left, then bottom right, then bottom left, then top right etc. Begin to torque them in the same order (it helps to pull the cover flush against the head, so it seats properly and no leaks!).
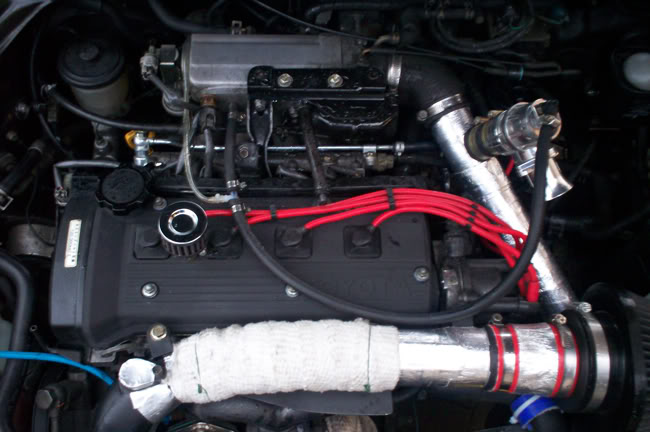
- Remove all the masking, put the HT leads back in, put the injector wiring back in place, bolt the EFI pipe back in place, re-connect PCV hose and anything else you undid!
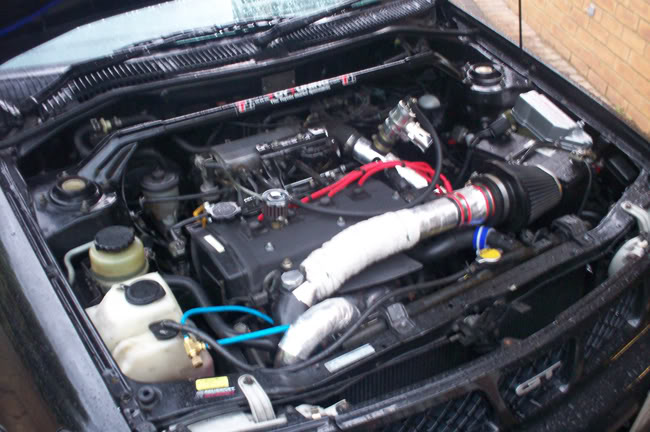
- Job done!
Thanks to ChrisGT and dan_ep82
Flathead screwdriver(s)
10mm socket
Torque wrench
Needle nose pliers
Spray paint of your choice, I chose matte black VHT spray
Drill and abrasive brush (from Halfrauds )
White spirit, de-greaser & cloths
New Toyota rocker cover gasket – Part No 11213-11041
New Toyota washers and nuts (not necessary, but might as well!)
About:
Removing and spraying your rocker cover is very straight forward and requires very little technical know-how or tools! Easily attemptable for almost anybody! Doesn’t take very long either! 15mins to take cover off, then prep and paint leave to try and re-fit!
Guide:
- Remove HT leads (remember their order for re-fitting!) and keep to one side.
- Disconnect hose from PCV valve to inlet mani (circled red) and any other bits that might be in the way.
- Unbolt EFI pipe from bracket and rotate EFI pipe slightly forward to give you some more room.
- Locate the five nuts that hold the rocker cover in place (circled red).
- Remove nuts with 10mm socket
- Once the nuts have been removed you will see the five rubber washers that sit beneath them.
- I did not buy new nuts/washers so use a combination of pliers and flat head screwdriver and gently remove the washers without damaging them.
- Once the washers are away the rocker cover needs to come out, however the injector loom behind the rocker cover gets in the way and stop its from lifting up.
- Undo the 10mm bolt that holds the plastic box to the support bracket and cable tie it to the throttle cable protector (circled red). Keeps it well out of the way for removing the cover.
- Now this is out of the way make sure everything else is clear, and use a flat head screw driver for each of the four corners of the cover and gently prise the cover up. Once all four corners are free wiggle the cover off, be very gentle if you’re not going to be replacing the gasket as I was a bit brutish and tore the gasket.
- TIP: The bracket the EFI pipe bolts to gets in the way so it’s best to try and get the cover out from the back. It should come out fairly easily.
- Once the covers off you should see the following:
- TIP: You can’t see it that well, but there were bits of gasket that stuck to the head. Use needle nose pliers and gently remove these as they may prevent the new gasket from seating properly.
- Prep time! First of all I used some de-greaser and cloth to get most of the muck off, then a wire brush and some wire wool. Once I was relatively happy I started to use a drill and abrasive brush drill bit, cleaned it up a treat!
- Took about 30mins of cleaning to get it shiny.
- It was now ready for paint so I used some white spirit and a cloth to clean the surface up as best I could and masked up the areas I didn’t want to be sprayed (PCV valve, oil breather, oil filler and spark plug holes).
- You can now begin painting! I built it up with a number of thin light coats. Leave to dry. I only left it about 1.5hrs as the VHT stuff dries incredibly quick and will properly cure once on the engine and it gets hot.
- Rocker cover painted! Now to refit it!
- It’s simply a matter of doing the above steps in reverse, making sure to properly fit your new gasket of course! Simply pull the old one out of the rocker cover and push in the new one.
- Now gently put the rocker cover back onto the head so it lines up and the lugs show through. A bit of wiggling is required
- It may not be necessary to properly torque the nuts but I did, better to be safe than sorry! You want to torque them to 7Nm using a torque wrench like the above one.
- Re-fit the rubber washers (give them a clean)
- Lightly hand tighten the nuts in criss-cross order; so starting with top left, then bottom right, then bottom left, then top right etc. Begin to torque them in the same order (it helps to pull the cover flush against the head, so it seats properly and no leaks!).
- Remove all the masking, put the HT leads back in, put the injector wiring back in place, bolt the EFI pipe back in place, re-connect PCV hose and anything else you undid!
- Job done!
Thanks to ChrisGT and dan_ep82
Last edited by a moderator: