sorry for this being in the wrong section, perhaps a kind mod can move it to the how to bit?
Basically, its Easter, im off, stuff gets took apart!
I have a GReddy BOV fitted to my mx5, and recently acquired a blatant copy one, so fancied taking them apart for comparison.
My Blue BOV is believed to be a genuine one, as it came GReddy boxed, but even at this, I cant certify that its legit (tbh who cares if it works lol!)
sooooo....
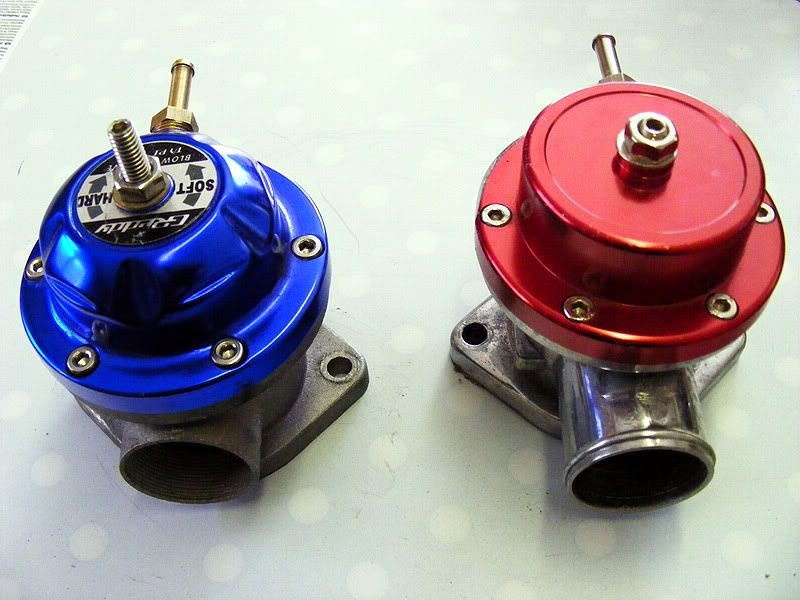
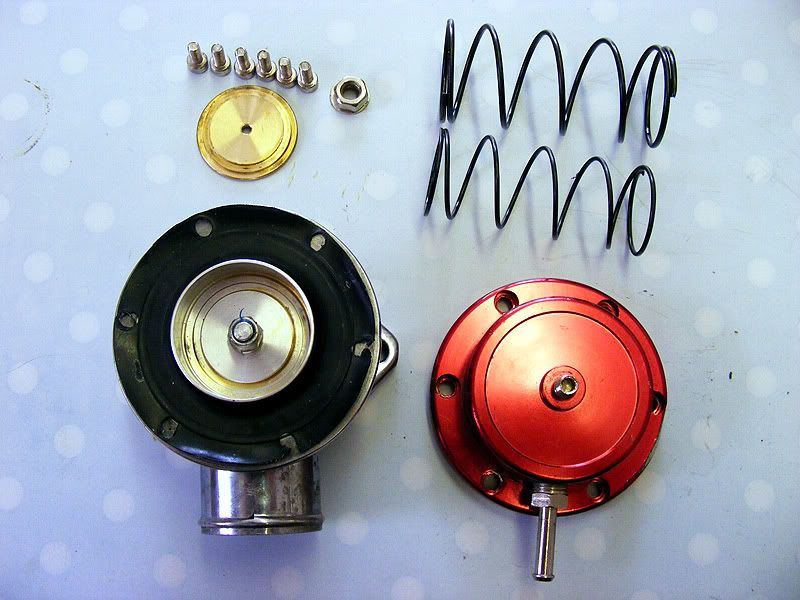
on the left we have the 'genuine' unit, a type RS style, and on the right, the blatant copy of the slightly earlier type s unit.
note the blue one is sandcast, whereas the copy is a lovely polished finish. the outlet mouths are of different length, but both are threaded for the incredibly easily lost mouths.
Again note the spring tension adjusters on top - ive got the blue one slackened right off to get it to work on the mx5.
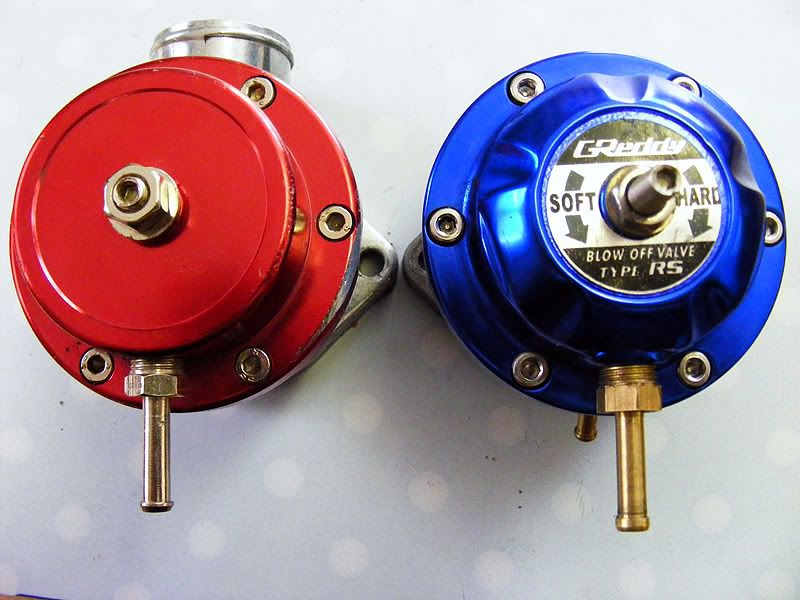
top down view - again note the difference in outlet length
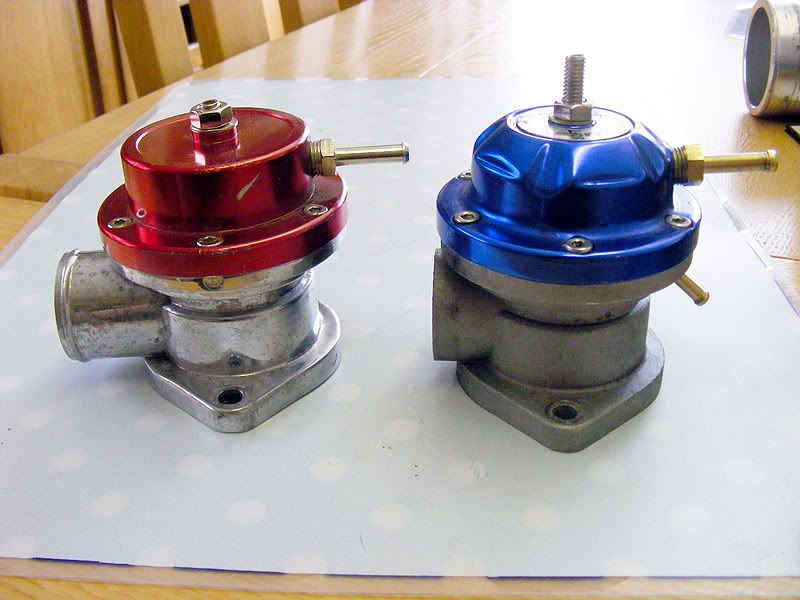
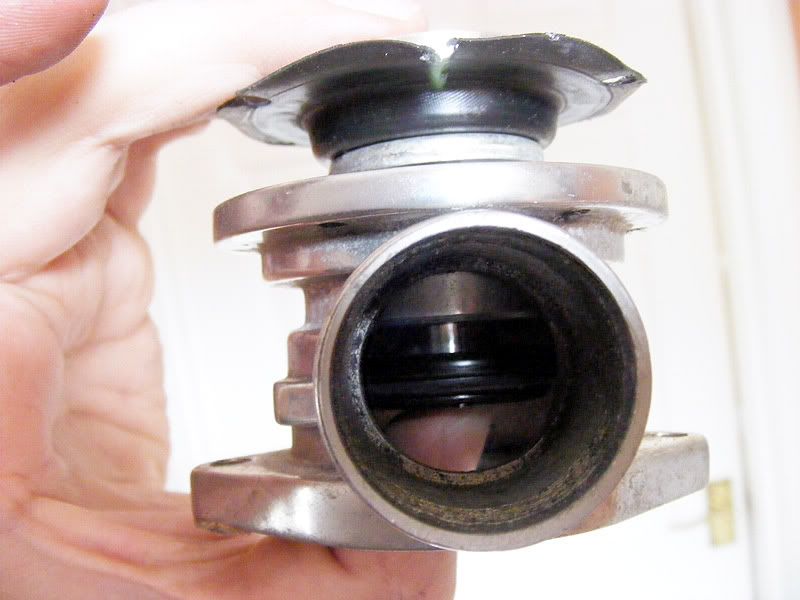
side view - note the 2nd port on the blue one, this is to connect to pre throttlebody side on external gate setups i believe. The red copy has this port, but the ham fisted previous owner has broken it - still -no issue for us internal gate users!
on dissassembly, you can leave the spring adjusters on the top of the BOV in place, they arnt fastened to anything inside.
Whilst dissassembling the unit, please take care on the final few allen key bolts, the bov is under immense pressure from the spings inside, and could result in you havig a very sore face if the cap is not held down whilst removing the last few bolts.
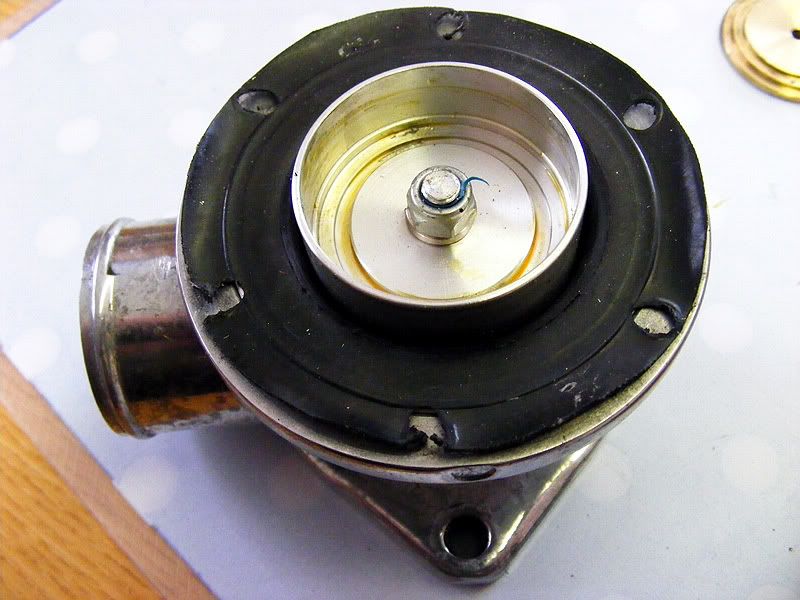
heres where it gets interesting. Note the copy has the channel for the rubber o-ring seal, but no o-ring - they must have figured that it isnt needed thus saving a fair bit of production cost. The GReddy unit has the o-ring in place.
this is what you will be greeted with upon removal of the top cap.
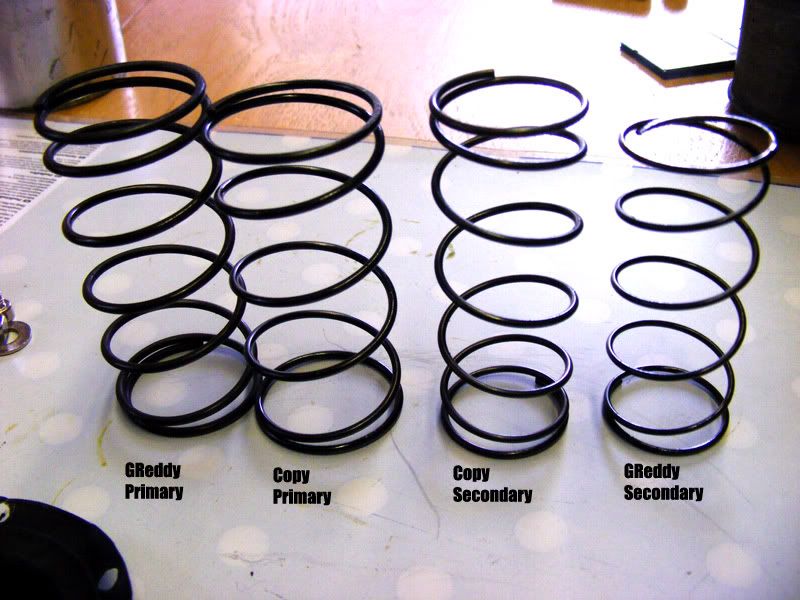
note the use of two springs inside - low pressure users like myself can remove the inner, lighter, spring and still get good results.
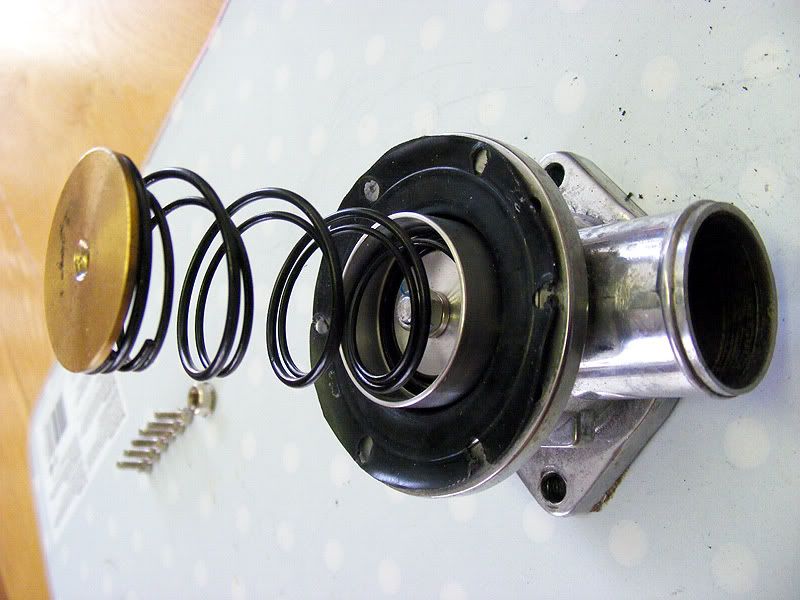
the springs can be simply lifted out, and the seat removed from the top, this leaves you with:
here is the copy valve exploded out:
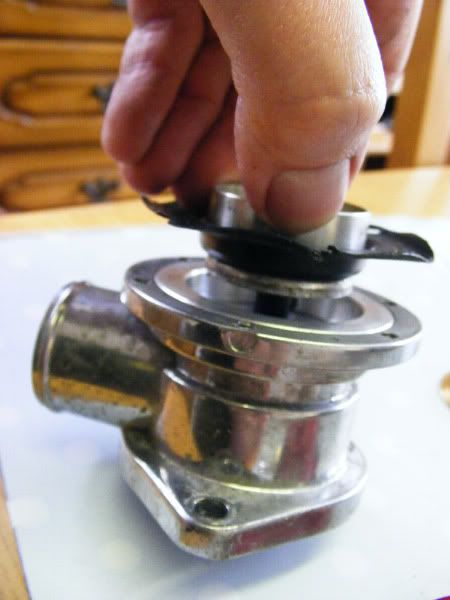
at this stage you can take the final assembly out, by putting your fingers in underneath the bov and popping the piston upwards, and out:
this will leave you with the empty bodies:

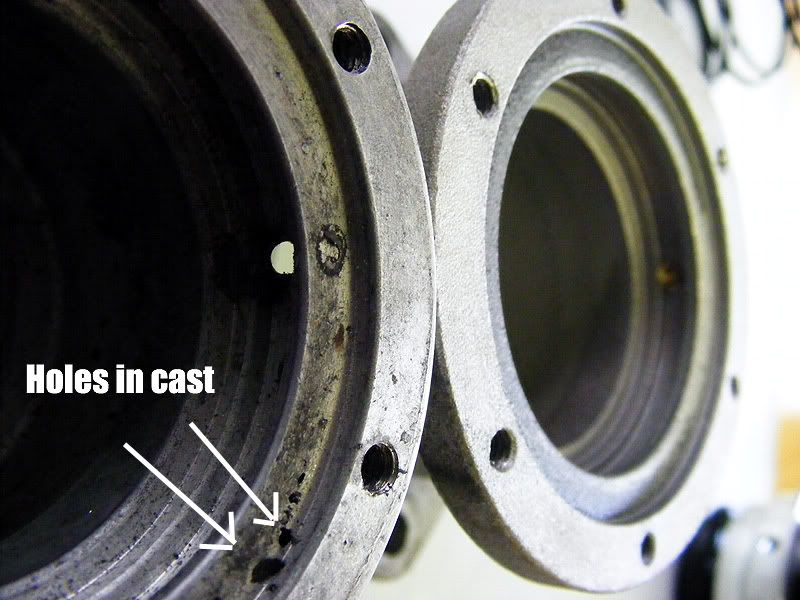
at this stage I noticed the flaws in the cheaper casting:
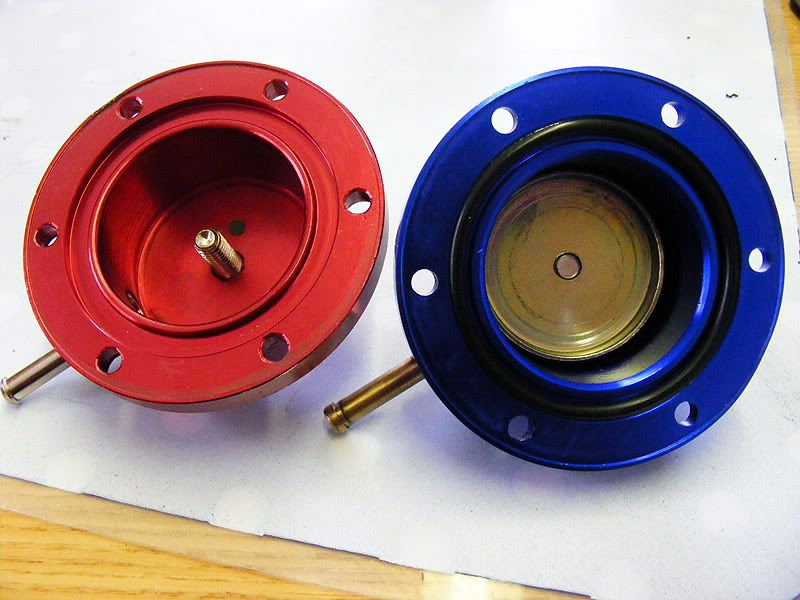
heres where your money went:
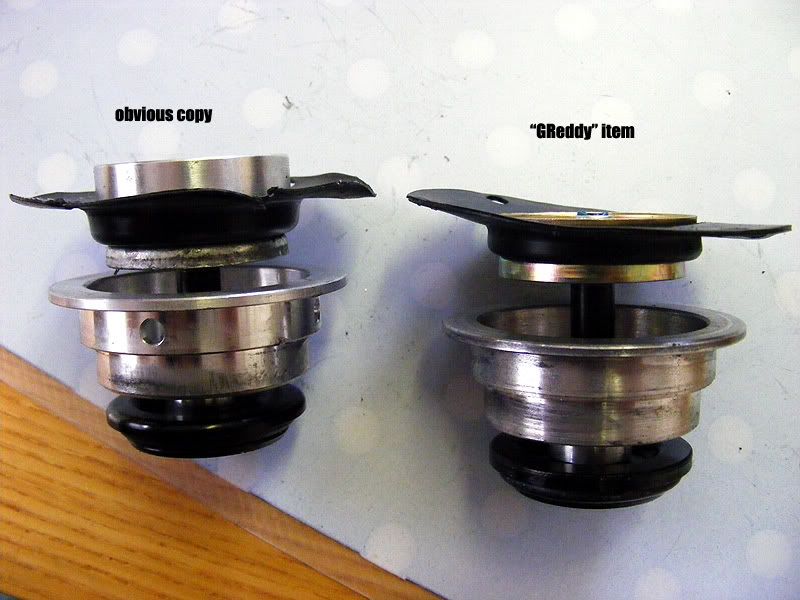
the greddy unit has a much much thicker heavy rubber diaphragm! much more robust, that said the thinner cheaper one is still doing the same job, and GReddy want $80 for a replacement rubber diaphragm!?!?!?!
note the copy has little holes bored through the lower part of the assembly, I assume this is to negate vacuum building on the underside of the more delicate diaphragm?
to strip this assembly, simply use an 8mm socket on the top nut and remove.
and finally, the different springs lined up!
hope this helps you guys!
Basically, its Easter, im off, stuff gets took apart!
I have a GReddy BOV fitted to my mx5, and recently acquired a blatant copy one, so fancied taking them apart for comparison.
My Blue BOV is believed to be a genuine one, as it came GReddy boxed, but even at this, I cant certify that its legit (tbh who cares if it works lol!)
sooooo....
on the left we have the 'genuine' unit, a type RS style, and on the right, the blatant copy of the slightly earlier type s unit.
note the blue one is sandcast, whereas the copy is a lovely polished finish. the outlet mouths are of different length, but both are threaded for the incredibly easily lost mouths.
Again note the spring tension adjusters on top - ive got the blue one slackened right off to get it to work on the mx5.
top down view - again note the difference in outlet length
side view - note the 2nd port on the blue one, this is to connect to pre throttlebody side on external gate setups i believe. The red copy has this port, but the ham fisted previous owner has broken it - still -no issue for us internal gate users!
on dissassembly, you can leave the spring adjusters on the top of the BOV in place, they arnt fastened to anything inside.
Whilst dissassembling the unit, please take care on the final few allen key bolts, the bov is under immense pressure from the spings inside, and could result in you havig a very sore face if the cap is not held down whilst removing the last few bolts.
heres where it gets interesting. Note the copy has the channel for the rubber o-ring seal, but no o-ring - they must have figured that it isnt needed thus saving a fair bit of production cost. The GReddy unit has the o-ring in place.
this is what you will be greeted with upon removal of the top cap.
note the use of two springs inside - low pressure users like myself can remove the inner, lighter, spring and still get good results.
the springs can be simply lifted out, and the seat removed from the top, this leaves you with:
here is the copy valve exploded out:
at this stage you can take the final assembly out, by putting your fingers in underneath the bov and popping the piston upwards, and out:
this will leave you with the empty bodies:
at this stage I noticed the flaws in the cheaper casting:
heres where your money went:
the greddy unit has a much much thicker heavy rubber diaphragm! much more robust, that said the thinner cheaper one is still doing the same job, and GReddy want $80 for a replacement rubber diaphragm!?!?!?!
note the copy has little holes bored through the lower part of the assembly, I assume this is to negate vacuum building on the underside of the more delicate diaphragm?
to strip this assembly, simply use an 8mm socket on the top nut and remove.
and finally, the different springs lined up!
hope this helps you guys!
")